public PhotoLab(EzImage image)This is the constructor. The input parameter is the source image.
public EzImage getOldImage()This returns the current EzImage object (the original, untouched image).
public EzImage getNewImage()This returns the new EzImage object (the modified image).
public boolean crop(int rowStart, int rowStop,
int colStart, int colStop)
Crops your image. Extracts only those pixels from pixels
rowStart through rowStop and
colStart through colStop. If any of the
parameters are out of range for your image, leave the image unchanged
and return false. Otherwise, return true.
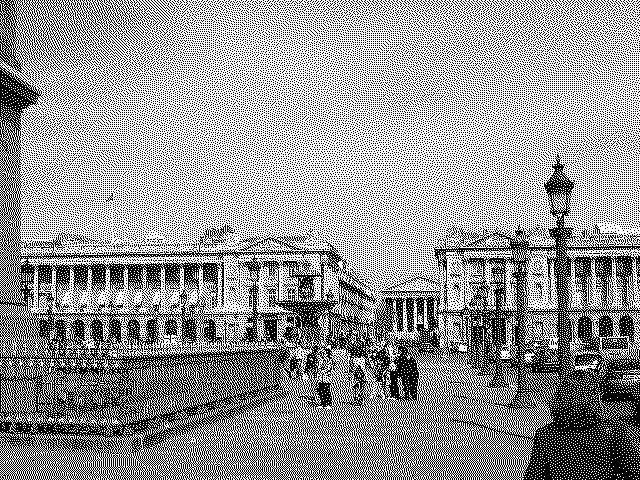
public boolean dither()Dithering is a technique used when you want to print a gray picture in a place such as a newspaper where no shades are available. Instead, you need to use individual pixels of black and white to simulate shades of gray. The popular Floyd-Steinberg algorithm for dithering is as follows:
- Loop over all pixels, running across one row at a time.
- For each pixel: if its value is larger than 128, set it to 255 (pure white). Otherwise, set it to 0 (pure black). Record the "error", which is the old value of this pixel minus the new one.
- This "error" represents how much blackness we have added to this pixel. Distribute this blackness to adjacent pixels as follows:
- Add 7/16 of the error to the pixel immediately to the right ("east").
- Add 3/16 of the error to the pixel immediately diagonally to the bottom left ("southwest").
- Add 5/16 of the error to the pixel immediately below ("south").
- Add 1/16 of the error to the pixel immediately diagonally to the bottom right ("souhteast").
- Any error to be distributed to pixels that are out of range should be ignored.
Dithering should only be done on gray images, so return false if
the image isn't gray already. You can use the EzImage
instance method copyToGrayScale() to convert an image to
gray.
In order for dithering to work, you must make your changes to the same image that you are looping over. Dithering by reading one image and making your changes on a copy will not work correctly, because the "error" never gets a chance to accumulate. In other words, make sure that you make a gray scale copy of the image first, and then do all dithering work (looping, reading, writing, etc.) on the copy itself.
public boolean overlay(EzImage overlayImage,
int row, int col)
Overlays a smaller
overlayImage onto the image, as in the
example below. If overlayImage can't be placed on the
image (perhaps because it is too large or row or
col are not valid), return false. Otherwise,
return true.
public boolean circleCrop(int centerRow, int
centerCol, int radius)
Crops the image to a circular shaped portion of the original with a center at
centerRow
and centerCol and a radius of radius. Since
the image itself must still be rectangular to fit inside a window,
make the background of the rest of the image white. See example below,
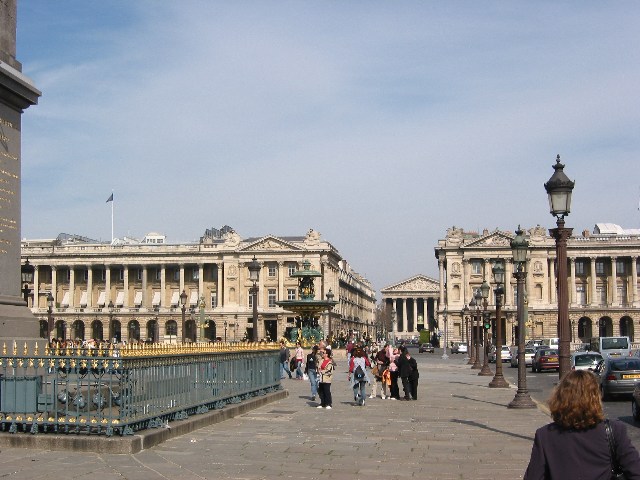
which was cropped from background3.jpg. If
centerRow, centerCol, radius,
or some combination thereof are invalid, return
false. Otherwise, return true.
public boolean scale(double scaling)Scales your image. If
scaling is 2, for example, your
image should double in size. Likewise, if scaling is
0.25, your image should be 1/4 the size of the original. If
scaling factor is less than or equal to 0, make no
changes to the image and return false. Otherwise, return
true.public boolean blur(int radius)Blurs an image. For each pixel, average all of the pixels within a circle centered at that pixel and with a radius as given. Make sure to put all of your results in a new array, instead of overwriting your original as you go; otherwise, your blurred pixels will cascade on top of each other. Keep in mind that some approaches to programming this result in much slower algorithms. On my office machine, which is slightly slower than the lab machines, I can blur background3.jpg in 5 seconds with a radius of 3 and 20 seconds with a radius of 10. Any technique that works will receive most of the points for this problem, but you need to end up with timing close to these numbers if you wish to earn it all.